
Making C Not Suck in Visual Studio Code
The weakness of defaults
ByContents
Visual Studio Code has been a pain to me for my entire coexistence with it. While I eventually moved to the greener pastures of customization at Neovim, I have seen enough of the same fixes that I thought I ought to share how I made my time writing in C/C++ less agonizing.
Most of these troubles come from the default that Visual Studio Code provides.
The Defaults
The default experience for new users editing C/C++ code in Visual Studio Code is questionable. When you first open up a C/C++ anywhere in the editor, Visual Studio Code sends you a notification telling you to get an extension called the C/C++ Extension Pack.
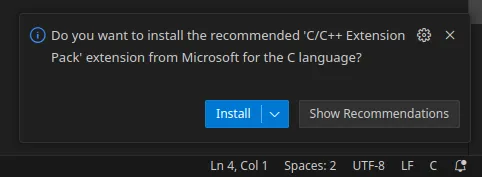
Surely this is exactly what you need to have a fast and clean editing experience, right? Let’s check!
This pack installs:
- C/C++ Extension Pack
- C/C++ (language server, slow)
- C/C++ Themes (redundant color schemes)
- CMake (tools for CMake software, not used by all new developers)
- CMake Tools (see previous note)
Looking at these tools, we can note that you only really want one of them—the C/C++ Extension. The other extensions provide things that are most likely useless to the average developer trying out C. The themes are essentially just the default dark theme with very slightly altered code colors. The CMake related plugins are only useful if you wish to specifically use CMake in your project.
The C/C++ Extension itself is a bit dodgy; the provided error highlighting takes relative ages to tell you once you’ve messed up and leads to constantly stopping to wait for the extension to wake up and do its job.
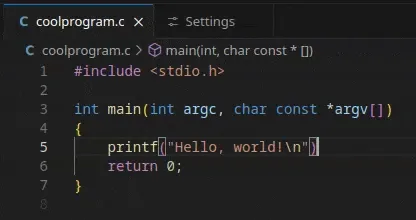
In addition to this, the auto-completion it provides are lackluster. When you write in a valid function and try to complete it, the extension just writes out the rest of the name—not completing the arguments.
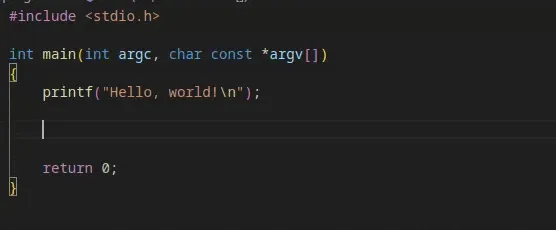
In addition to these annoyingly mediocre features, it doesn’t even make it clear that the C/C++ extension provides a formatter or how to use it.
(It’s ctrl+shift+i, if you’re wondering)
The formatter works alright, though the method to customize it is buried in the documentation.
Improving the Setup
We can fix it through a few changes:
- Uninstall the C/C++ Extension Pack
- Get clangd (language
server, fast)
- Enable or disable inlay hints
- Get C/C++ Snippets (auto-complete for things
like
iforforoptional) - Get Clang-Format (formatter, customizable)
- Enable
Format On Save
- Enable
- Set the
clang-format.styleoption to what you want
The first step is to just uninstall the C/C++ Extension Pack. This will uninstall all of the tools noted above in one step. You won’t need them after the next steps.
Clangd
You can obtain the clangd extension via the extensions tab under llvm-vs-code-extensions.vscode-clangd or with the
following command in the Quick Open (Ctrl+p) menu:
ext install llvm-vs-code-extensions.vscode-clangdIf you did not follow the step above to uninstall the C/C++ Extension Pack, you will receive a notification at the bottom right telling you to disable IntelliSense the C/C++ Extension. Do that.
After the plugin is installed, you will note that the error highlighting works almost instantly now.
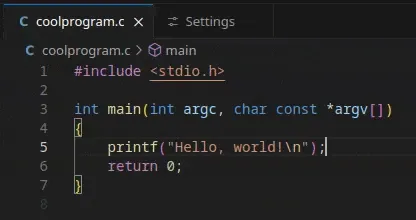
You may also note that functions have ghost text within them noting function parameter names. This is called Inlay Hints
and can be toggled through the Command Palette (Ctrl+Shift+C) command clangd: Toggle inlay hints.
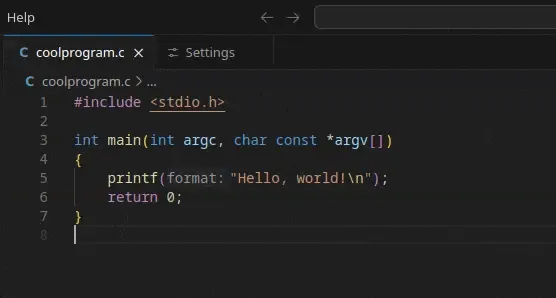
These two options are generally all you need to know about the very basics of using clangd.
C/C++ Snippets
You can obtain the C/C++ Snippets extension via the extensions tab under hars.CppSnippets or with the following
command in the Quick Open (Ctrl+p) menu:
ext install hars.CppSnippetsNow if you type printf or other functions in a C file, you will get useful completions!
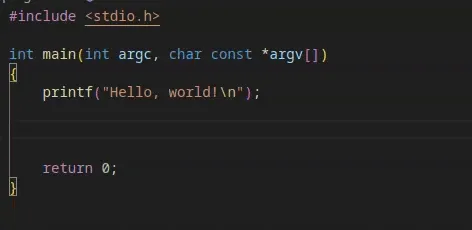
The ones provided by this plugin include more general and filled out versions of control flow statements like forr, or
switch.
Clang-Format
You can obtain the Clang-Format extension via the extensions tab under xaver.clang-format or with the following
command in the Quick Open (Ctrl+p) menu:
ext install xaver.clang-formatI was checking the reviews on this plugin while researching this and many mention that they existing C/C++ extension
has the same functionality, but that requires its IntelliSense to be enabled which breaks things when combined with
Clangd.
After installing, you should now be able to format your code. By default, this can only be done manually with either the
Command Palette (Ctrl+Shift+C) command Format Document or through its keybind of Ctrl+Shift+i.
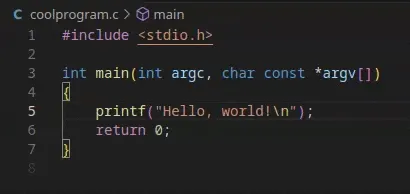
If you wish to automatically format your document whenever you manually save with Ctrl+S, you can enable it through
the setting editor.formatOnSave as changed in the settings menu accessed via Ctrl+,.
Customizing Formatting
By default, Clang-Format will find a .clang-format file to use as its formatting style. If you have a specific way you
like to format all of your code more complex than the provided options of LLVM, Google, Chromium, Mozilla, or WebKit,
you can specify it manually via JSON.
To customize your formatting options, open up the settings menu and search for clang-format.style. The default is
file which you can replace with a JSON string of the options you want as specified the
LLVM docs on Clang-Format.

The following JSON strings must be provided as the style parameter of a given language. Using them under
Fallback Style will not work and cause errors in the Output of your console.
Here is a basic JSON string setup:
{ BasedOnStyle: Google, BreakBeforeBraces: 'Attach', IndentWidth: 4, TabWidth: 4, ColumnLimit: 89, MaxEmptyLinesToKeep: 2, AlignTrailingComments: true,}The value of BreakBeforeBraces should be 'Attach' for K&R style and 'Allman' or unset for Allman style. The
default for Google is 'Attach', but if you wish to use another style it is important to have.
Here is what they look like:
// K&R ('Attach')while (x == y) {    foo();    bar();}
// Allman ('Allman')while (x == y){    foo();    bar();}
Decide on your style, then copy the JSON into the clang-format.style setting. Whitespace is ignored, though make sure
that you have commas between every property and that single quotes are used throughout.
Here’s the one from before on a single line:
{ BasedOnStyle: Google, BreakBeforeBraces: 'Attach', IndentWidth: 4, TabWidth: 4, ColumnLimit: 89, MaxEmptyLinesToKeep: 2, AlignTrailingComments: true,}
For the full documentation see the LLVM docs on Clang-Format as mentioned before.
Possible Issues
The clangd extension doesn’t provide formatting of its own leading to the use of the Clang-Format plugin. This is an issue as that plugin doesn’t allow you to use a local file by default while still having your own formatting as a fallback. The default C/C++ Extensions allows for this but has poor performance which I arbitrarily decided was worth the trade-off.
I could also be missing some obvious method to make the default plugin faster, but at that point it’s on the developers for hiding a “make it work better” option when they provide the extension pack as the default.
Conclusion
To be honest, I don’t like C. If you have the chance, program in anything else; Rust, Zig, JavaScript(??), anything but the horrors of C. If you must, I give you my greatest condolences and I hope prior advice can ease your pains if only by a little.